
We all hit creative brick walls sometimes and inspiration can be hard to find. Here are a few ideas to help you get back in the studio with a fresh perspective with some new workflow tricks…
1. Limit yourself
Pick just one VST Instrument, synth or sample pack and try writing a whole track just using that. Limiting our options can sometimes spark fresh ideas and different ways of working that we wouldn’t usually use. While having loads of choice in the studio is great, it can also sometimes curb our creativity having too many options.
Other than instruments and libraries that are purpose-built to be focused on one type of sound (a piano VST or a bass VST for example) the majority of VST instruments, synths and sample libraries have most sound design categories covered. You will find everything from basses, synths, pads, leads, keys, effects, drums, and sometimes even vocals. So pick one tool that you think has all the elements that you will need for your track and start a fresh project in your DAW. Use as many instances of your chosen tool as you need, on as many tracks as you need, to try and squeeze the most out of it. Also, try recording sounds in as audio and use the audio editing tools and effects in your DAW to shape and warp your sounds into something new.
Here’s a recent track I did using this method only using 1 synth to rebuild one of my favourite tracks:
6 BRAND NEW PLUGINS AVAILABLE NOW!
Get HUGE savings for a limited time on our 6 brand new plugins, including Vocalator Pro, LFO Pro, BEEF, Anarchy Comp, Pulsar & Duplex
2. Break away from the loop
One of the toughest jobs when you’ve been listening to your 16 bar loop over and over for hours, is turning it into a fully arranged track. Make this process easier by simply duplicating that loop a few times so it covers 5 or 6 minutes on the timeline, then go back to the start and gradually deconstruct it. This will help you transform your loop into a fully arranged track very quickly. Using this technique has saved me countless hours and headaches over the years and many of my best tracks have come from it. If you follow these steps and try and make it a habit for every track, it will get you from loop to arranged track a lot quicker, every single time. It’s a lot easier than starting from a blank page at bar 1 and trying to write every single part from scratch bit by bit as you go along.
I’d like to point out at this part of the walkthrough, I’m assuming that we are making some kind of DJ friendly dance music. ie; Techno, House, Drum & Bass, Trance, EDM etc. Arrangements will vary for other genres. Putting together an orchestral, hybrid, pop, acoustic, metal or rock arrangement would be quite different. I’ll cover these in an upcoming blog post. If you have suggestions on what you’d like me to cover in my next blog post on this subject, then feel free to leave a comment below and I’ll happily try and do that for you asap.
Anyway, I digress. Back to the arrangement…
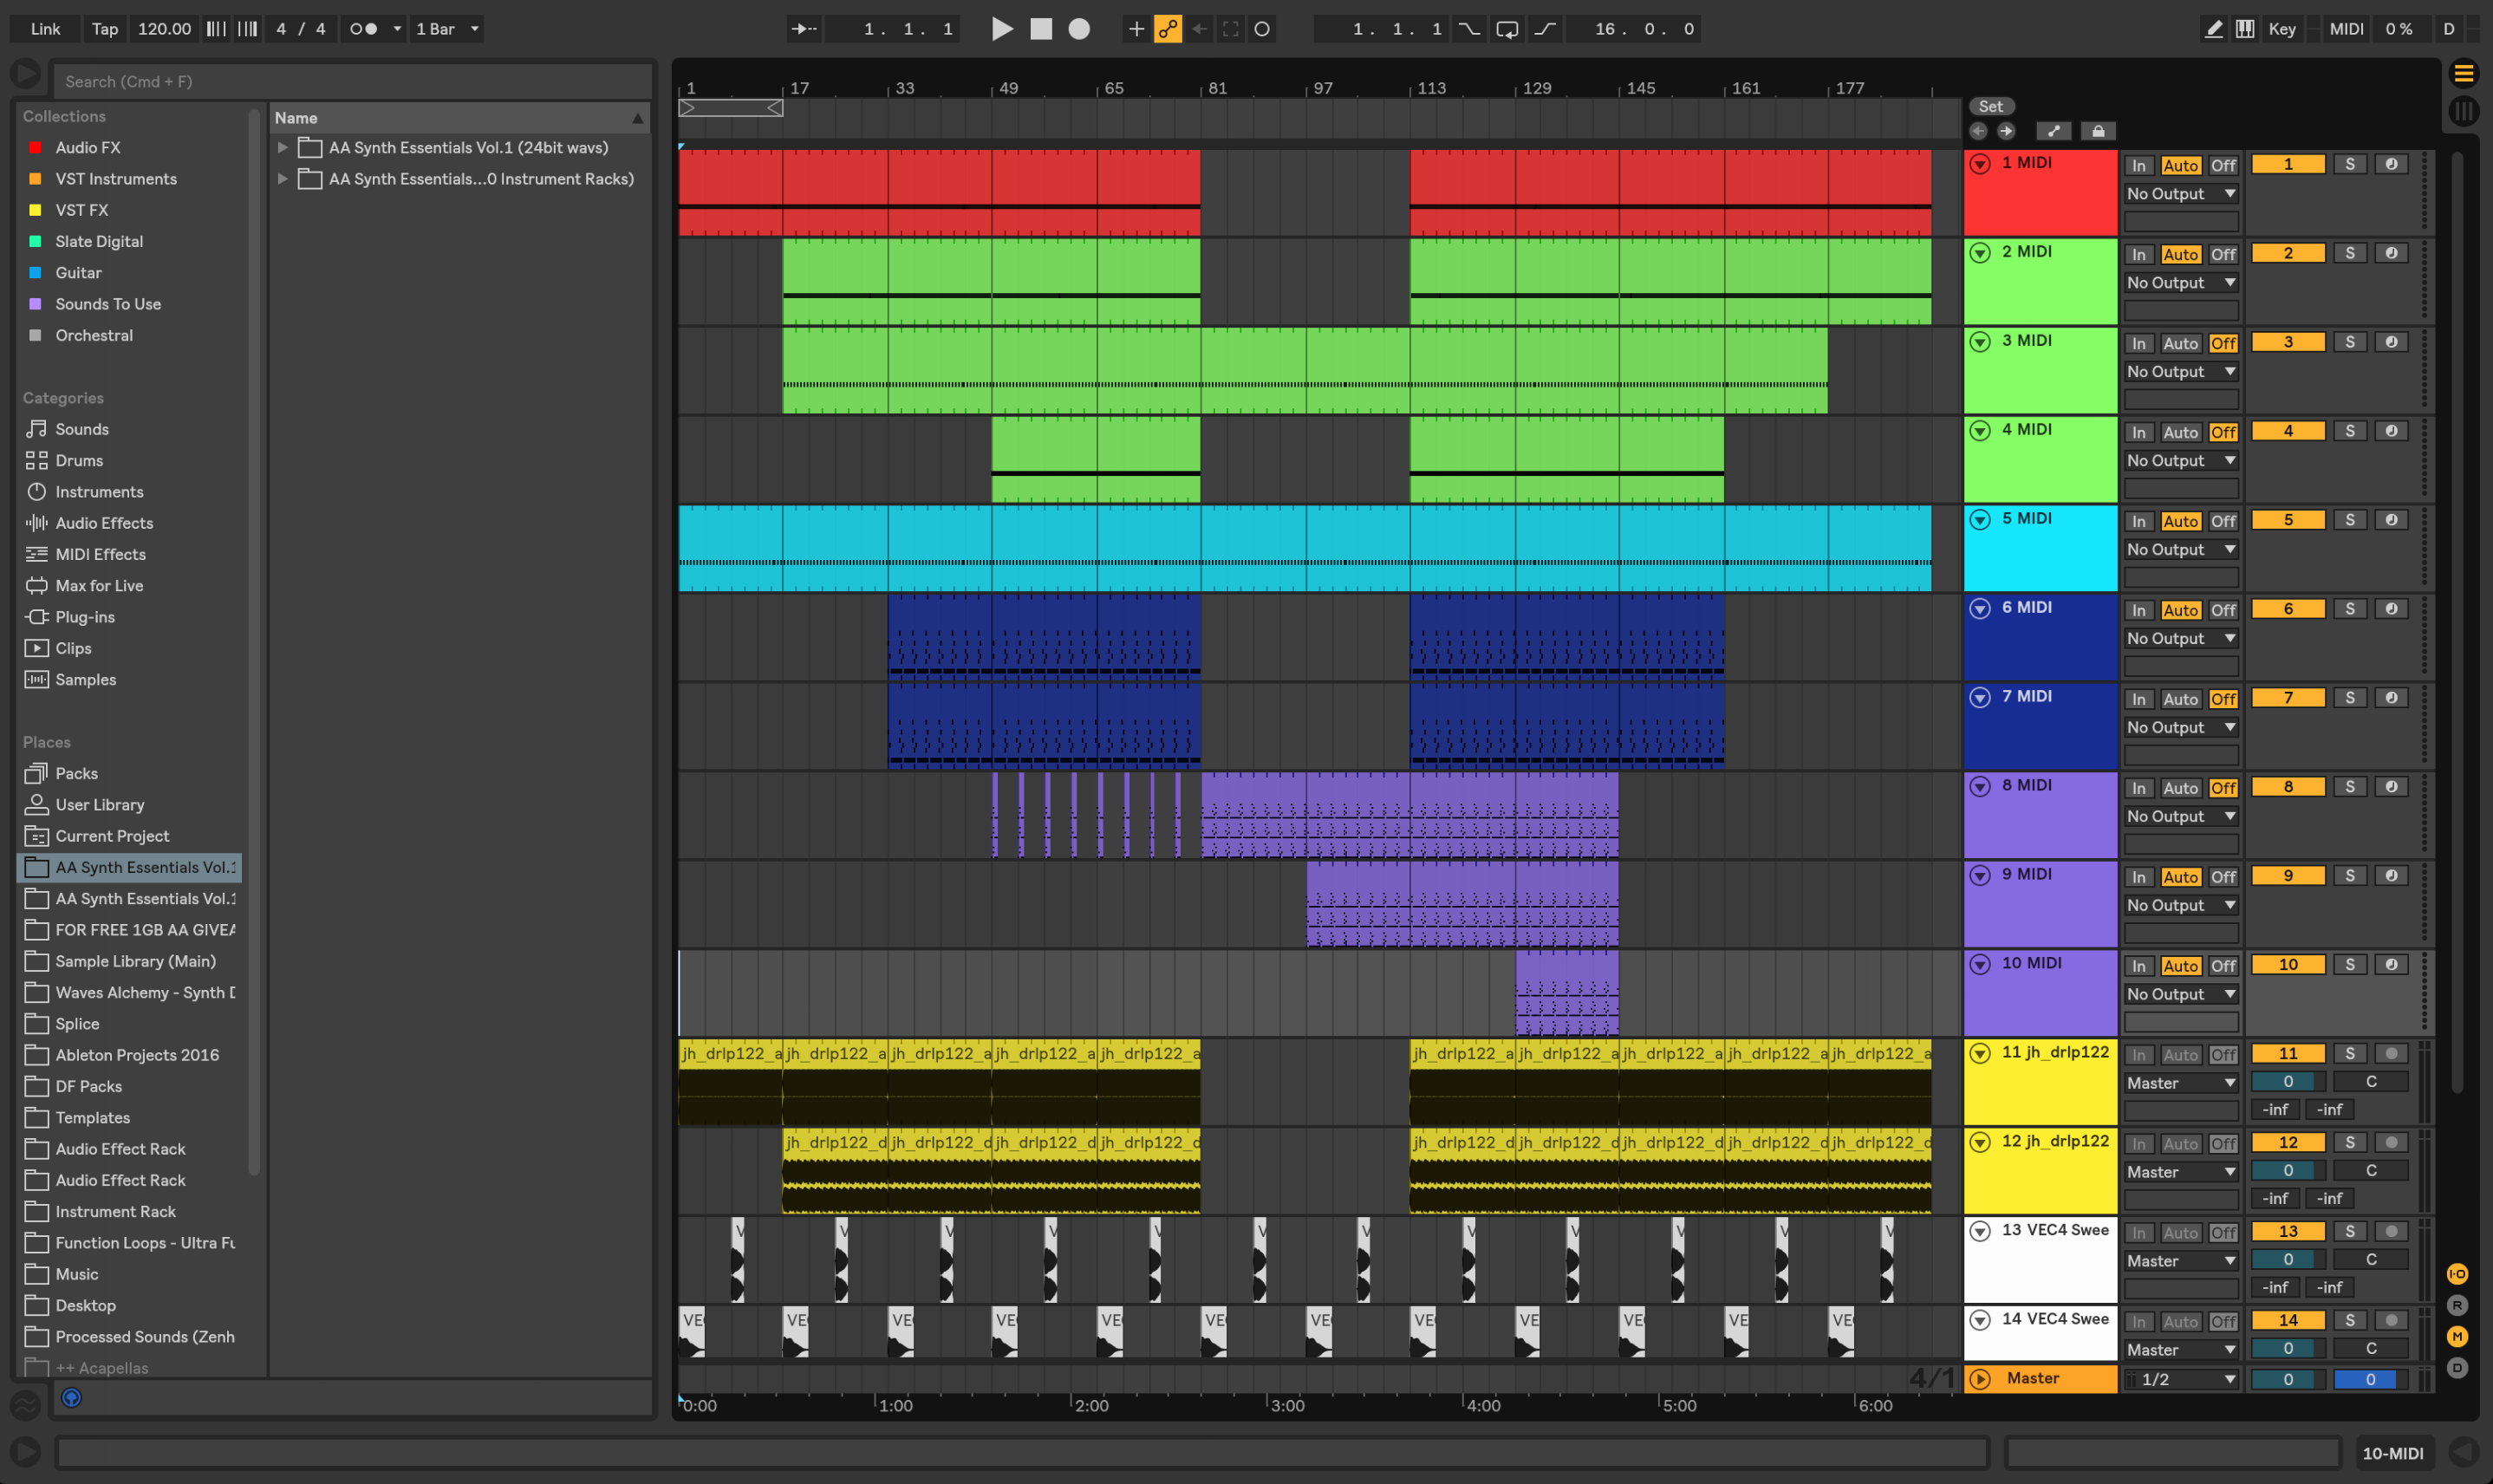
First, make sure that the 16 bar loop that you have created is suitable to be the main drop of your track. It doesn’t have to be perfect yet or totally filled out and mixed properly. A raw un-mixed sketch of a strong idea is fine for now. You can tidy everything up and add the bells and whistles later. Just make sure you have a good few layers written already that you can shift around and build an arrangement out of.
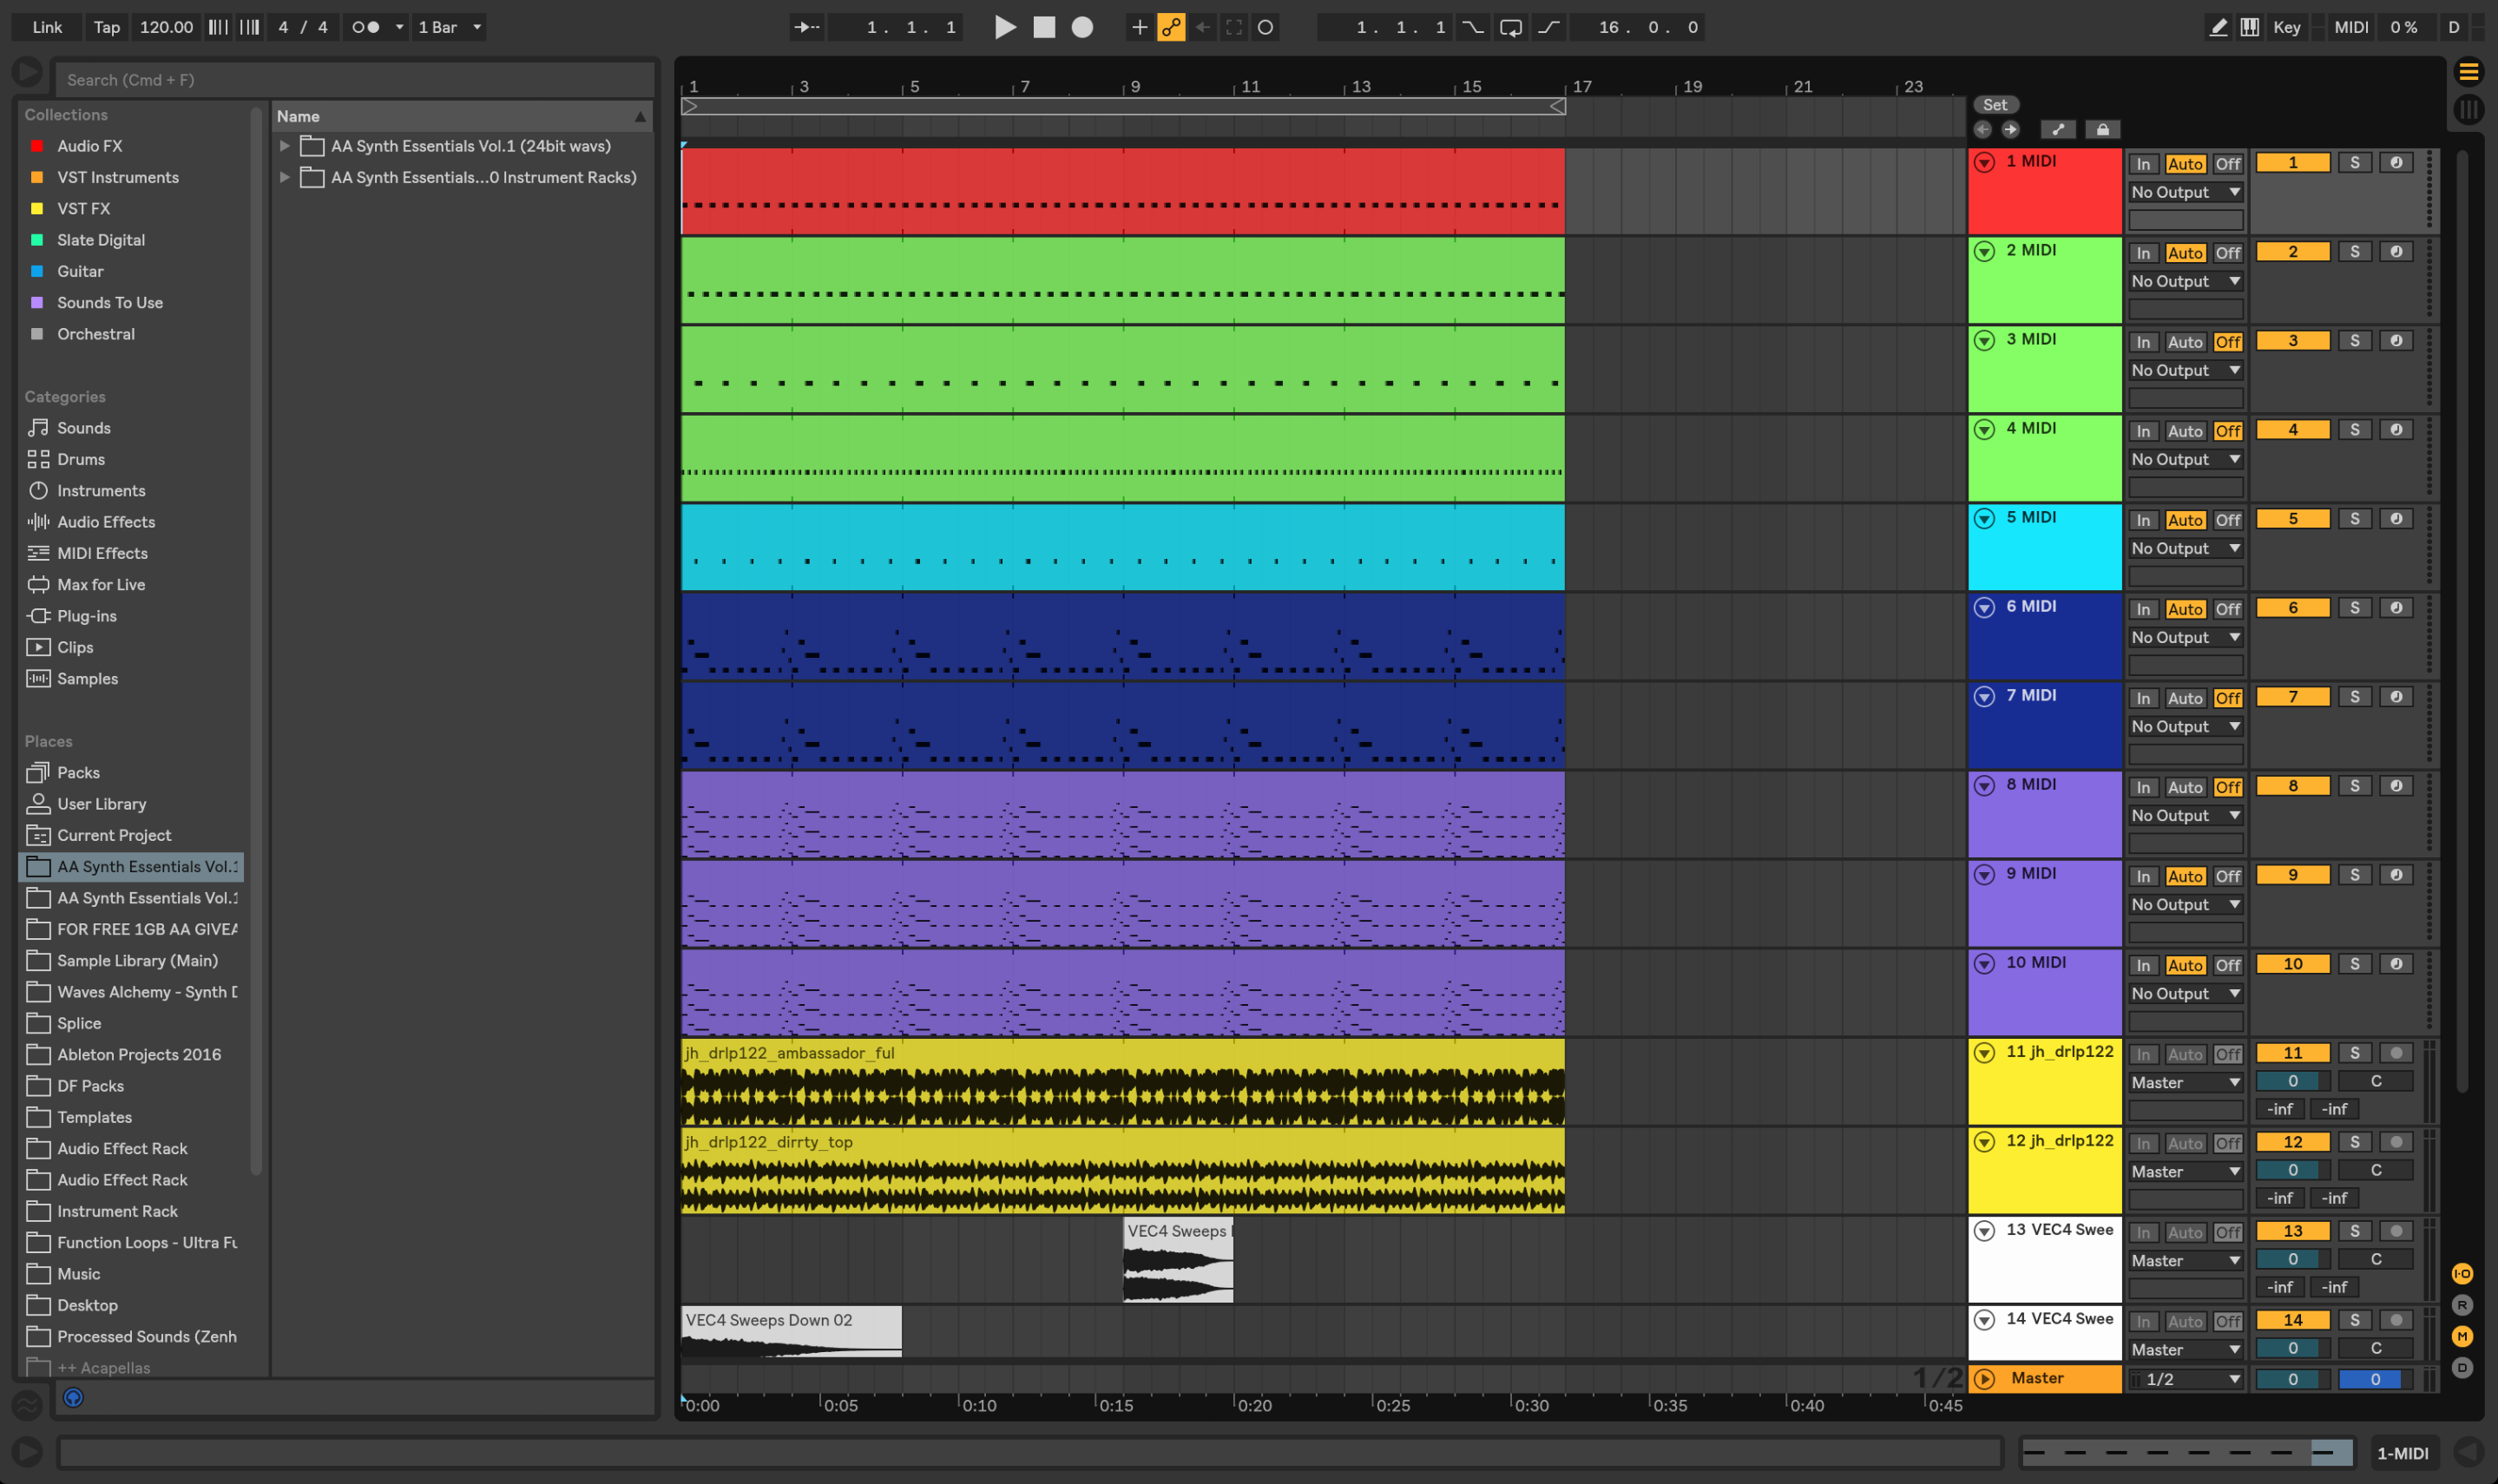
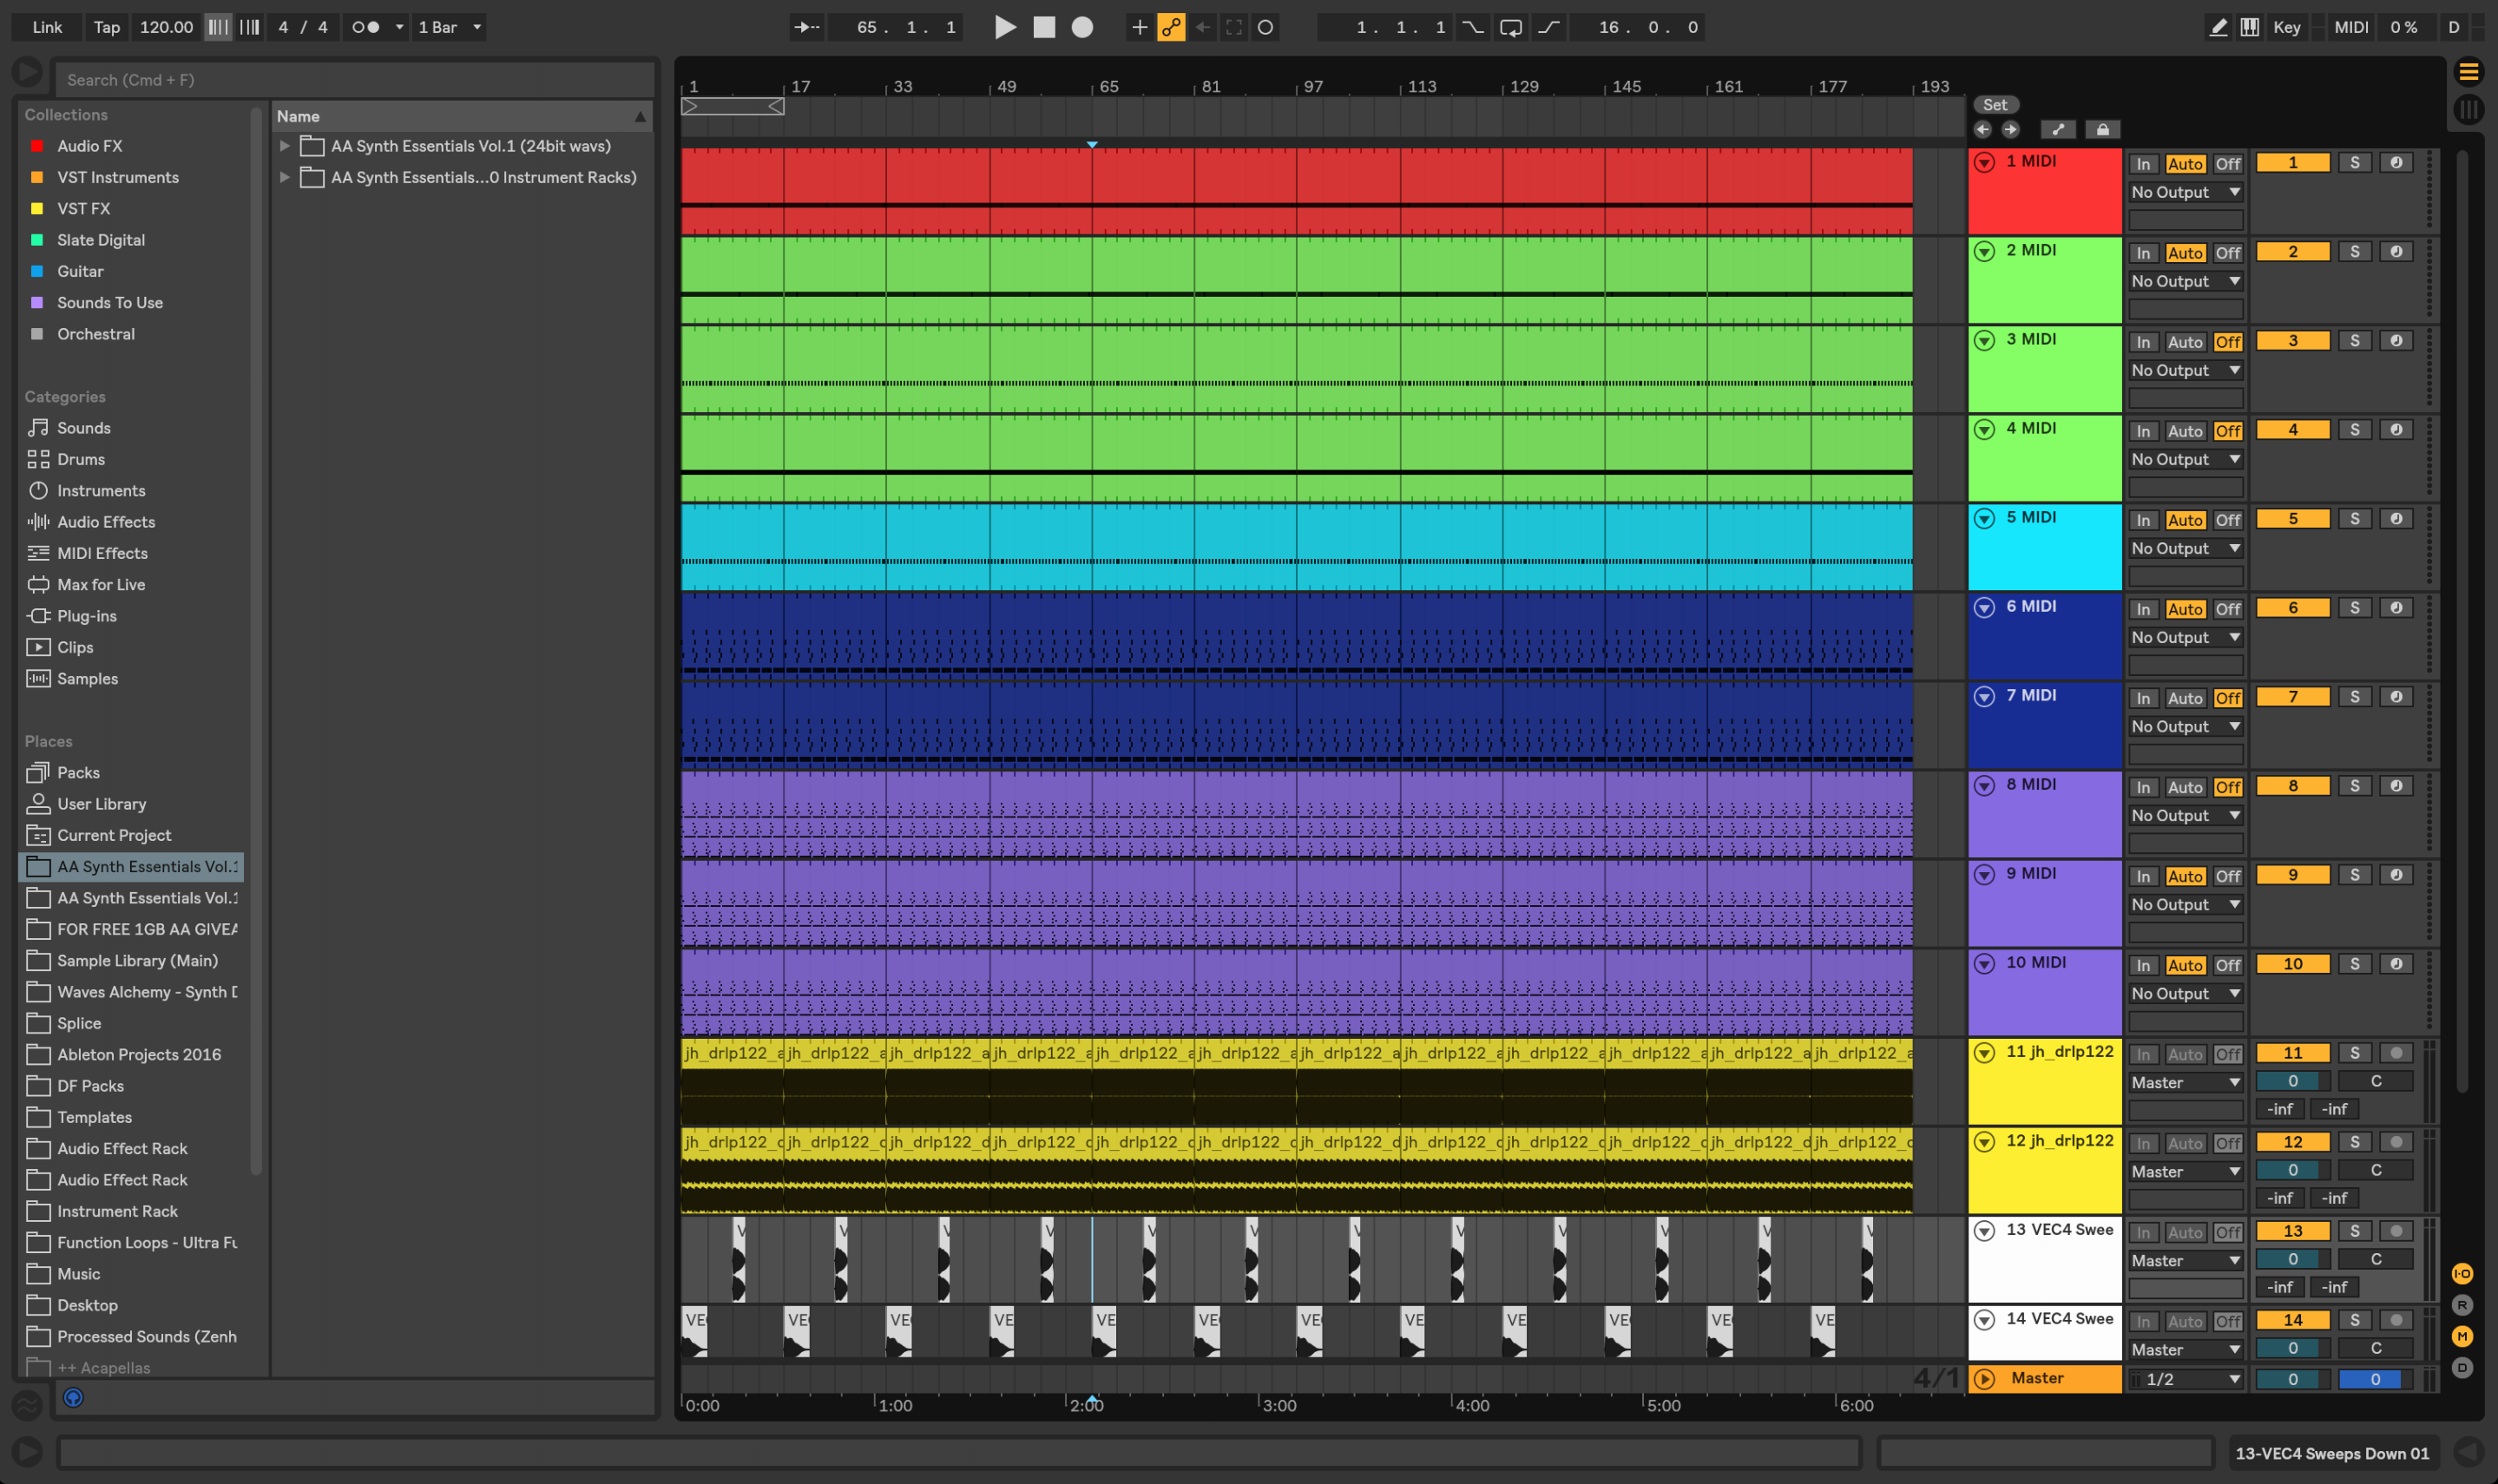
Copy your loop along the timeline so that it’s covering roughly the amount of time that a finished track in your genre would be. Then go back to bar 1 and start deleting or muting the blocks for the MIDI / audio
When it feels right, usually around the 1 minute / 33 bars mark, drop your bass in there. Let that run for 16 bars. Then, section by section, start adding your other elements bit by bit for another 32 bars or so.
During this part of the track leading up to the breakdown, I would usually advise against adding the full main riff in just yet. We don’t want to ‘spoil the surprise’ of the main drop that’s coming after the breakdown. If we added it here, the track could become samey and boring by the time we get to the drop if the main theme has been running for a while.
Saying that though, If you want to introduce a stripped back version your main riff before the breakdown, that can usually work well. A good technique would be to chop a couple of notes out of the main riff to use as stabs in the sections coming up to the break. You could try a couple of things here like maybe filtering or fading the stabs of the riff in gradually on the section leading up to the breakdown. This way, you’re starting to subtly introduce the main riff, but you’re not giving the whole game away about what’s coming next.
You could even try using those same MIDI notes that you cut out, but use a slightly lighter sound or a less layered version of the sound to the one that you will be bringing in fully after on the drop. This way, the main drop will have a lot more impact as well when it hits. Maximum impact is key here to get everyone going nuts on the dance floor, and also to make sure that the A&R people from whichever label you sent it are going to be to jumping out of their office chairs with excitement, resulting in them hopefully signing your masterpiece. These are both your goals for any track so if you get this part right, you’re onto a winner!
Now we’re up to the middle section of the track. Carve out a makeshift breakdown to use as a guide, somewhere around 32 bars long (48 bars at the very most) Now already we can see our target, which is to get out the other side of the breakdown and into to the main drop.
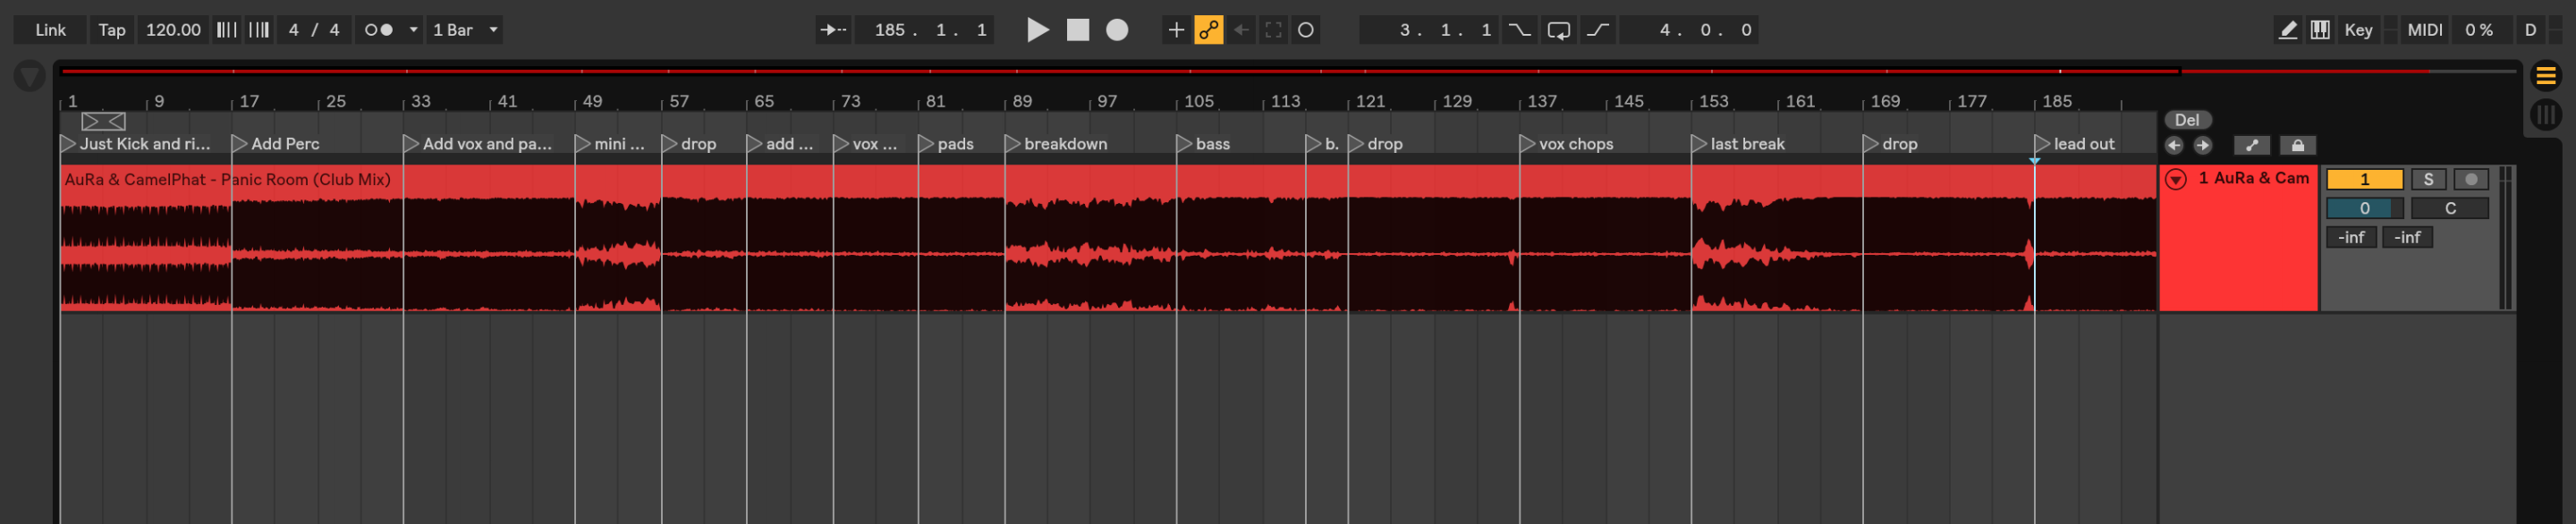
After a couple of rounds of the main drop, then its time to build it back down gradually to an outro where DJ’s would be mixing the next track in over the top. For now, just make this outro symmetrical to the way you built it up, something similar to the picture below.
Now like some crazy voodoo magic… we have the main core of our track all laid out.
“Listen back through your track a few times and make notes if you hear any gaps or if anything needs to be changed or added. These fixes could include things like adding variations and extra layers to create more depth and intensity, where drum fills could go, missing atmospheric effects, down sweeps, risers, build-ups and any other details that could add more flavour. Add these in bit by bit, and then any automation you want to use, or other sounds and layers on top if you feel it needs them.
Now you’ve won the arrangement, all that’s left to do is to get your mix on point. Take some time on this part and make sure that all of your instruments and layers are levelled and EQ’d correctly so they work together as a balanced piece. Make sure you have compression on all of the tracks that need it, and that all your effects, reverbs and delays are sitting well in the mix and not drowning your sounds. Also check that there are no roughly cut edits anywhere.
.
Now… finally your track is ready for mastering. That’s a whole different beast so I won’t go into detail on that here. You can master your tracks at home if you have the right plugins, knowledge and an acoustically correct room, but getting an external mastering engineer can be a great idea to get a fresh unbiased pair of ears onto your track to get the most out of the final master.
.
You can hire a professional mastering engineer to master your track for as little as £30 these days and all you have to do is send your pre-master over to them via email. They usually have purpose built mastering rooms and the best high-end equipment to get the job done to a very high standard, instead of you struggling for hours trying to get it right yourself.
.
You can find out more about nicely priced online mixing and mastering services here: https://anarchyaudioworx.com/mixing-and-mastering/
.
If you’re unsure of how to prepare your tracks for mastering engineers, check out this short step by step video below:
Need Help Finishing Your Tracks?
Get your ideas and unfinished tracks completed, mixed and mastered to a professional release ready standard by our in-house engineer, Steve Riggs AKA dharkfunkh
(Armada, Suara, Interscope, Nervous Records, KMS Records)
3. Rework an old project
Because us producers are always pushing ourselves to learn new skills and improve our sound, as time goes on and we get better and better at what we do, sometimes going back and listening to our older tracks can be a massively cringe-worthy experience. Even though at the time the track was great and everyone else you show it to still loves it, if you’re anything like me you will more than likely still sit there and pick your production apart, illuminating every tiny detail that you could have done better before banishing it back to the hard drive graveyard never to be heard again.
Instead of subjecting these poor once loved tracks to such a miserable fate, why not bring them back to life with a fresh rework using all the skills, knowledge, and probably better equipment and plugins that you’ve acquired since making the old version. It’s sacrilege to waste your old tracks. I’m sure if you re-made any of them now, you’d be pleasantly surprised with the results.
6 BRAND NEW PLUGINS AVAILABLE NOW!
Get HUGE savings for a limited time on our 6 brand new plugins, including Vocalator Pro, LFO Pro, BEEF, Anarchy Comp, Pulsar & Duplex
4. Learn from your favourite tracks
Analyzing your favourite music and working out how its put together is a great way to give yourself a blueprint arrangement template to work from for your own productions.
You should never copy someone else’s work, but there’s nothing wrong with taking inspiration from it to give yourself a head start… as long as you turn that inspiration into something original of your own.
Pick a track that you love and add it into your DAW as an audio file on the first channel at the top of your session. It’s good practice at this point to set the bpm of your session to the same bpm as your reference track so that you can keep everything in line. You can change the bpm later if needed.
As you listen through your reference track, make notes where different sounds are added and where different sections start and finish. Most DAW’s have markers that you can give custom names to and add along the timeline, so why not use these as a visual reminder for the start and end points for each sound or section, naming them accordingly as you listen. If your DAW doesn’t have this feature, any kind of notepad will also work just as well. Just write down the bar numbers next to each note you make so that you can understand it.
Take notice of the types of sounds used, where background effects rise and fall, and how automation is used. All of these things can be used as a guide to where your original sounds and production tricks will be added.
When you have your guides and notes in place, mute the reference track and start building your own original sounds and riffs into the project. This is a great way to create something that fits perfectly with the genre you are into while still incorporating your unique style.
You can also download full track templates and project files from the internet to learn from. You can dive in and analyze the midi files, audio files, and processing, see in detail how full tracks are arranged, and even change things around to turn it into something new of your own. These kind of templates come with the added bonus of having all the processing, effects chains and mastering chains in the file so you can see exactly what’s been added to every channel to make it sound so good. You can even save the processing chains that you like and use them in your own future projects. These are a hugely helpful resource for producers at any level. It’s always fascinating to see how different people work because no two people work the same, so when taking advantage of tools like these, every day is a school day! I’ll put a few links to these below:
Ableton Project File Template 1: https://anarchyaudioworx.com/get-down-low-ableton-live-project/
Ableton Project File Template 2: https://anarchyaudioworx.com/far-from-over-ableton-live-project/
Logic Pro X project File Template 1: https://anarchyaudioworx.com/empty-rooms-logic-pro-x-project/
5. Experiment with a new workflow
If you usually start your tracks by building the drums first, then adding a bass, then looking for synth lines or other instruments to fit around those… why not try starting a session from a different approach every once in a while to mix things up.
Maybe start with the main lead riff first and then write everything else around that.
Or, try working out a chord progression first on a simple piano sound and then change the sound to something else once the notes are right. Flick through your synth sounds and pads until you find something strong you can base the rest of your song around.
You could also try starting with just a vocal. I find it’s a lot easier (and makes more sense) to write a track around a vocal than to already have melodic elements in your track on a certain key, and then have to try and find a vocal that fits perfectly with what you have written already. Sometimes re-pitching things can work, but it’s not always ideal. Depending on your choice of vocal, choice of sound design and choice of key, trying to bodge things together this way around can sometimes be a huge wild goose chase and end up sounding seriously weird! Not in a good way. So if you’re planning to have a vocal as the main feature in your track, it’s usually a lot better to start with that and write everything else around it if you want it to gel properly.
There are many ways we can switch things up and experiment when writing. By trying a few different angles, you might stumble across a more efficient way of working than what you are used to. Try a few things and see what happens.
**Keep in mind that it’s probably best to try new workflows when you have the time to experiment. If you have deadlines for labels, clients or anyone else, then wait until you are on your own time before trying these techniques. Leaving people waiting too long is never good for business!
6. De-clutter your workspace
This one’s simple. Tidy studio, tidy mind. You’ll be much more focused on creating if you’re not drowning in pizza boxes, overflowing ash-trays and empty red bull cans. Cable management is also good for the soul!

Need Help Finishing Your Tracks?
Get your ideas and unfinished tracks completed, mixed and mastered to a professional release ready standard by our in-house engineer, Steve Riggs AKA dharkfunkh
(Armada, Suara, Interscope, Nervous Records, KMS Records)
7. Minimise distractions
Picture the scene… The record button is lit and you’re bang in the middle of nailing the best take of that ground breaking riff you’ve been working towards all day. Only 4 bars of recording to go and you’re crushing it! Then suddenly, out of nowhere the rediculous DING DING DING of your electronic communication device stops you in your tracks, ruins your take, and drags you kicking and screaming out of the zone. Said device swiftly leaves the studio via the window and your masterpiece is ruined. Now that you’ve lost all focus thanks to this outrageous interruption, your next take sucks! So does the next. You try a couple more times but the moment is lost forever and you eventually throw in the towel. You leave the studio and spend the next hour frowning at the TV, mumbling to yourself that you were never cut out for music anyway and decide that you should probably become a postman. R.I.P music career!
?
Ok, maybe that’s slightly over the top, but you get the picture. Distractions and interruptions have no place blocking the path of your genius in the studio. 9 times out of 10 when inspiration comes, if it isn’t captured as fast as possible then its lost forever… so rid yourself of those ridiculous distractions while you’re working.
Put your phone on flight mode, put your Mac, PC, iPad or any other device onto ‘Do Not Disturb’, close your email app down and get rid of your internet browser. Notifications are relentless creativity killers!
If you get distracted easily and struggle to not check your social media accounts every 5 seconds, then get some free apps to help you stay focused while you’re working.
The best tool I’ve found for this is a free app called ‘Self Control’. You create a list of offending websites inside the app and set a timer for however long you want to focus for. Until the timer runs out, you will be blocked from any website that you added to that list. Even if you un-install the app while the timer is running, you will still be blocked. Genius! No more procrastinating on Facebook + No more annoying distractions = Loads more quality music getting made! It’s a no-brainer.
There’s a list of links to the ‘Self Control’ app below. Pick the one for your device, download it, and install it. Your music will thank you for it!
Self Control (Mac FREE): https://selfcontrolapp.com
Self Control (iPhone / iPad $2.99): https://selfcontrol.apki.io
Self Control Alternative (Android FREE): https://alternativeto.net/software/cold-turkey/
Self Control (Windows FREE): https://chrome.google.com/webstore/detail/self-control/ncaaipdfhdijmfdfmeoagmogddhkfdec?hl=en
6 BRAND NEW PLUGINS AVAILABLE NOW!
Get HUGE savings for a limited time on our 6 brand new plugins, including Vocalator Pro, LFO Pro, BEEF, Anarchy Comp, Pulsar & Duplex
8. Prepare your sounds before you start
Before you start your project, create yourself a folder. This can be a kind of ‘sample library shortlist’ folder.
Listen through some sample libraries and copy anything that stands out into this folder. Try and obviously find sounds that you think will fit well together, but also throw a few curveballs in there. Some sounds you wouldn’t typically use.
A couple of tools I use to make searching through my samples a lot quicker and easier are:
1. Loopcloud 3.0 by Loopmasters. Your whole sample library can be imported into this free program and you can quickly refine your search options to find any sound that you are looking for. You’ll be surprised how many samples you own already that you have forgotten about, or never even used. Loopcloud’s sample browser also links up directly to the Loopmasters store all from the same window inside the program, so if you need fresh sounds you can buy them one by one and add them to your collection. I made a video explaining how Loopcloud works properly below, and you can download the program for free here: https://bit.ly/2PHhH9G
2. Splice.com. Splice works in a similar way to Loopcloud. Once you subscribe, you can easily search for and download single samples by using a refined search. You can also construct your own ‘repack’ sample packs on the site for specific projects and then download them into the convenient desktop app. They give you 100 credits a month (so you can download 100 samples a month) and your un-used credits also roll over to the following months so you always have credit there when you need fresh sounds.
You can try Splice out for free here: https://bit.ly/2RuJvif
Now that we’ve gathered our audio samples, we’re going to repeat a similar process in our VST Instruments.
Pick a couple of your favourite go-to VST Instruments and flick through the presets, re-naming and saving any sounds that you think might work for your project into the plugins ‘user’ folder. If you can make a custom folder for this specific project inside your plugin, even better! The options will differ from plugin to plugin so just find somewhere you can save your presets to that can be easily recalled once you start writing.
Once you’ve picked a healthy amount of sounds, open a new project in your DAW and get to work using the brand new sound palette that you’ve just created. I find this approach to be a good way of keeping you moving quickly while writing and staying much more focused, instead of having to trail through huge libraries of sounds at the same time as trying to write. There’s always method to the madness!
9. Give yourself a deadline (Set a timer)
If you want to be superhuman productive and get as much done as you can in a session, then set yourself targets. For example; ‘In the next hour I’ll have ‘X, Y and Z’ finished’. Use a countdown timer on your computer or phone and stay fully focused on the project until the time is up. If you’re planning on recording during this time, make sure the alarm going off isn’t going to ruin your take. In this case, you could use a visual countdown timer on the screen instead of an alarm.
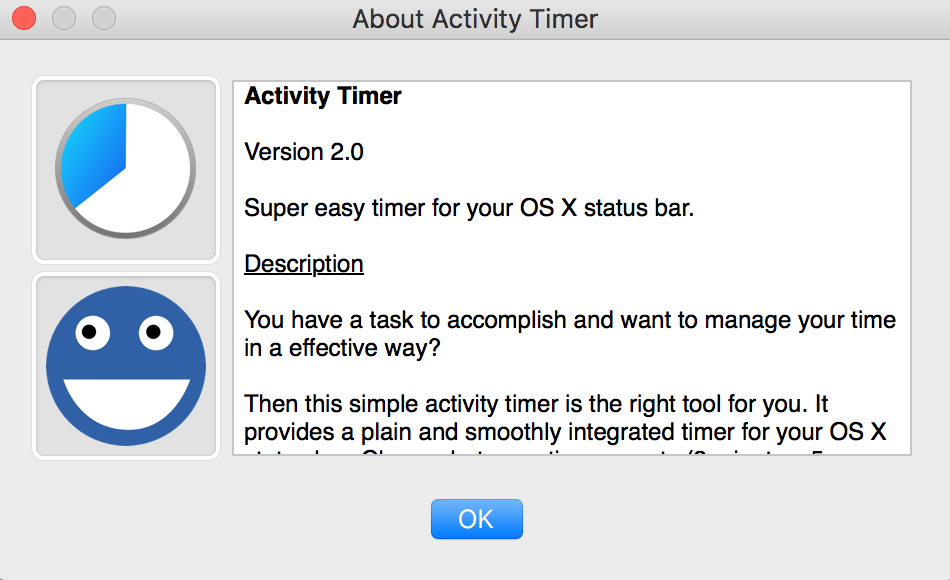
The free OSX app, ‘Activity Timer’ is a great tool for this: https://bit.ly/2TojHlm
If you’re on Windows, you can use ‘Free Timer’: https://bit.ly/2F5g1l4
10. Try using chord and scale plugins to get inspiration
Whether you can crush musical scales and chords like Beethoven, or you have no knowledge of music theory what so ever, there’s no excuse anymore for writing lifeless, out-of-tune riffs or boring chord progressions. Most DAW’s nowadays come with built-in scale and chord tools that you can use to spark ideas and make sure that all of your instruments are working together in the right key. There are also arpeggiator tools built-in to most DAW’s to add pitch and rhythm variation to your now already perfectly tuned parts.
As well as the built-in tools, there are also endless amounts of amazing feature packed third-party plugins that you can get that do all of these things, and much more. A big favourite of mine at the moment is ‘Riffer’ by Audiomodern. I’ll put my video walkthrough of that below so you can see why.
You can try the free trial of ‘Riffer’ here: https://bit.ly/2PWnEMw
I hope these tips have given you some ideas to get moving on some fresh music. Let me know how you get on with them in the comments.
Now, let’s make some noise!!
6 BRAND NEW PLUGINS AVAILABLE NOW!
Get HUGE savings for a limited time on our 6 brand new plugins, including Vocalator Pro, LFO Pro, BEEF, Anarchy Comp, Pulsar & Duplex
Need Help Finishing Your Tracks?
Get your ideas and unfinished tracks completed, mixed and mastered to a professional release ready standard by our in-house engineer, Steve Riggs AKA dharkfunkh
(Armada, Suara, Interscope, Nervous Records, KMS Records)
Been working with Riggsy for many years and he always does a great job whatever the genre of music, we’ve made some classics together
From Radio 1 to underground club bangers, Steve and his sounds always deliver. Can't say much more than that! 5 Stars!
As expected, nothing but quality! 5 Stars!
This guy is amazing. From sound design to mixdowns and mastering. Always at hand with good advice and sound solutions.
I wouldn’t go anywhere else for my own, or my clients music! <3
Maaaate you are a rockstar! Seriously, take my money forever!
Fantastic review fromthe main man himself, every tip is a tutorial in itself.